
A loose cabinet door usually announces itself with a subtle drop. You go to close the cupboard after grabbing a coffee mug, and the door hits the bottom frame with a dull clatter instead of shutting smoothly. When you inspect the hinge plate mounted to the cabinet carcase, you find the culprit right away. One of the mounting screws is sticking out a few millimeters, spinning freely in place when you try to tighten it with a screwdriver. The threads have chewed through the surrounding material, leaving a powdery pocket where solid wood used to be.
This problem happens in almost every home because modern cabinetry relies heavily on engineered wood panels rather than thick planks of solid timber. Repairing a stripped screw hole is not simply a matter of driving in a thicker or longer screw. Doing that often splits the cabinet frame or interferes with the adjacent door. To make a lasting repair, you need to understand how the core material behaves under stress and how to replace the missing wood fiber with a solid, machinable plug that can hold mechanical threads once again.
Why Hinge Screws Tear Out of Fiberboard
Why do these screws loosen so easily in the first place? The answer lies in the way manufactured boards are made. Most modern kitchen and bathroom cabinets are constructed from medium-density fiberboard, often called MDF, or particleboard. Unlike solid lumber, which consists of long, continuous cellular fibers bundled together like strands of rope, engineered board is made from sawdust, wood chips, and synthetic resin pressed together under heat. The resulting sheet is flat, uniform, and stable, but it lacks natural tensile strength along an unbroken grain line.
Think of a solid wood board like a thick bundle of uncooked spaghetti tied tightly together. When a screw enters the bundle, it pushes the strands aside, and the fibers clamp down hard against the steel threads. Fiberboard, by comparison, behaves more like a tightly compacted granola bar. The screw cuts into the resin and crushed wood particles, but the holding power comes entirely from the adhesive bonding those tiny particles together. Over time, that bond can fail under cyclic stress.
Every time you open a cabinet door, the hinge acts as a lever arm. A standard wall cabinet door might weigh between 6 and 14 pounds. When that door swings open to a 90-degree angle, its weight exerts rotational leverage, known as torque, directly on the hinge plate. The screws located farthest from the pivot point experience a continuous pulling force, called tension, while the screws closest to the frame experience a sliding force, called shear. Because the door is opened and closed thousands of times over its lifespan, this constant back-and-forth movement micro-fractures the brittle resin inside the screw hole. Eventually, the threads pulverize the surrounding particleboard into fine dust, and the screw pulls free.
The Toothpick Quick Fix for Light Duties
Can you fix a stripped screw hole without pulling out a full workshop of tools? Yes, if the door is lightweight and the hinge is not subjected to heavy daily pulling. The toothpick technique is a classic field repair that adds fresh cellulose and glue to the hollowed-out void, giving the original screw threads something solid to bite into.
This repair works best on small spice cabinets, false drawer fronts, or secondary hinge holes where the screw only needs to resist light shear forces. It is not a permanent solution for wide pantry doors or heavy doors fitted with soft-close mechanisms that exert strong leverage on the carcase. For those applications, you should use a hardwood dowel instead.
To carry out the toothpick repair properly, follow these concrete actions:
- Remove the hinge screw completely and take the cabinet door off its hinges so the work area is clear of all mechanical tension.
- Clean out the hole by inserting a small vacuum nozzle or using a hand blower to remove the loose, crushed wood dust trapped inside.
- Select round, wooden toothpicks made from birch. Flat toothpicks are often too weak and brittle. If you use wooden strike-anywhere matchsticks instead, always slice the chemically treated ignition heads off completely with a utility knife before use.
- Coat three or four toothpicks generously with standard polyvinyl acetate wood glue.
- Insert the coated toothpicks deep into the stripped hole until they bottom out. Pack as many as the hole will comfortably accept without cracking the surrounding surface of the cabinet.
- Cut the protruding ends of the toothpicks flush with the face of the cabinet wall using a sharp pair of diagonal wire cutters or a utility knife blade laid flat against the board.
- Allow the glue to support at least 8 hours. Rushing this step will allow the screw to push the wet wood skewers out of the back of the panel.
Once the adhesive has cured into a rigid composite mass, drive the original screw back into the center of the plugged hole by hand. Avoid using an electric drill driver for this final turn, because the motor can easily strip the newly formed wooden core before you feel the screw seat home.
Drilling and Plugging with Hardwood Dowels
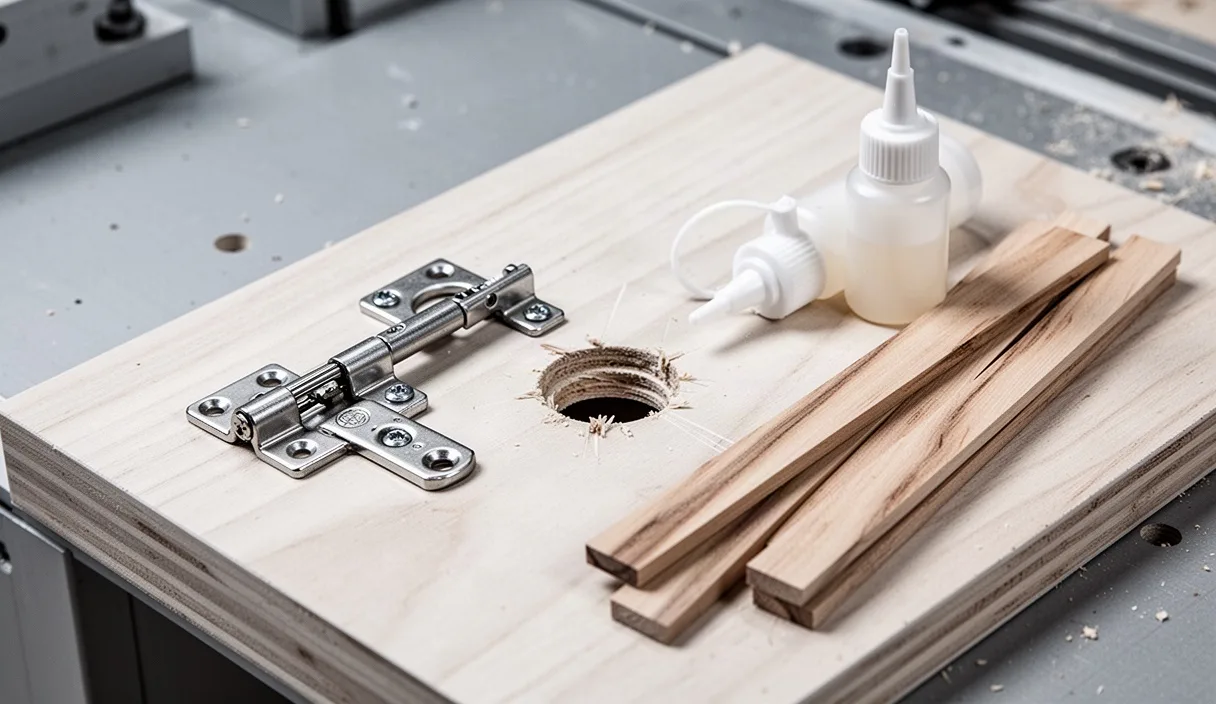
When an active kitchen cabinet door rips out of its frame, toothpicks rarely hold for more than a few weeks. The structural solution is to replace the damaged, crumbly region with a cylinder of genuine hardwood. By boring out the pulverized fiberboard and gluing in a birch or maple dowel, you create a solid foundation that accepts new screw threads with the holding power of real lumber.
What diameter dowel should you select? For most European-style concealed hinges, which use standard number 6 or number 8 wood screws, a 3/8-inch (approximately 9.5 mm) hardwood dowel is ideal. A 1/4-inch dowel is sometimes used, but its perimeter is narrow enough that a slightly off-center pilot hole might hit the boundary between the dowel and the weak fiberboard. The 3/8-inch plug gives you a wider safety margin of solid wood.
Follow these practical operations to install a hardwood plug:
- Dismount the cabinet door and set it on a padded worktable. Unscrew the hinge mounting plate from the cabinet frame so the damaged site is fully exposed.
- Chuck a 3/8-inch brad-point drill bit into your drill. Brad-point bits have a sharp center spur that prevents the bit from wandering across the slick melamine or veneer surface.
- Wrap a piece of bright masking tape around the drill bit exactly 1/2 inch from the tip. Cabinet side panels are typically 5/8 inch or 3/4 inch thick. This tape flag acts as a visual stop to prevent you from drilling straight through to the exterior face of the cabinet.
- Bore straight into the stripped screw hole, keeping the drill perpendicular to the cabinet wall. Stop instantly when the edge of the tape flag touches the wood face.
- Vacuum the chips out of the fresh hole. Wipe the interior walls with a dry cotton swab to eliminate loose dust.
- Cut a section of your 3/8-inch hardwood dowel roughly 1/8 inch longer than the depth of the hole. If the dowel has a smooth surface, lightly score shallow, crisscross grooves along its length using 80-grit sandpaper or the edge of a utility knife. These grooves give the glue an escape path and a rough mechanical surface to latch onto.
- Coat the walls of the drilled hole and the circumference of the dowel with wood glue. Press the dowel firmly into the hole until it bottoms out. A gentle tap with a wooden mallet will ensure it is fully seated.
- Let the assembly rest untouched for 12 to 24 hours so the glue polymerizes fully.
- Trim the protruding dowel nub flush with the cabinet wall. A flexible Japanese flush-cut saw works best here because its teeth have no lateral set, meaning they will not scratch the finished melamine or wood veneer surrounding the repair.
Choosing Wood Glue: PVA versus Polyurethane
The strength of a plugged hole depends entirely on the adhesive boundary between the new wood dowel and the engineered cabinet core. Woodworkers generally debate between two common adhesives for this task: standard polyvinyl acetate (PVA) and polyurethane glue. Each behaves differently when applied to porous particleboard.
PVA glue, commonly known as carpenter yellow glue, works by water evaporation and absorption. The liquid carrier draws deep into the porous cellular structure of both the hardwood dowel and the surrounding fiberboard. As the water leaves, microscopic plastic polymers tangle together within the wood pores, creating a durable mechanical lock. PVA glue cleans up with plain warm water while wet and support to an amber, semi-flexible state that withstands ordinary hinge vibration.
Polyurethane glue works through a chemical reaction with ambient moisture rather than through evaporation. When polyurethane support, it releases carbon dioxide gas, which causes the liquid adhesive to expand into a stiff foam. This foaming action can be helpful if your drilled hole is slightly irregular or pitted, as the glue expands into tiny voids that PVA cannot fill on its own. However, this expanding foam has low structural density. If there is a noticeable gap between the dowel and the hole wall, the hardened foam will crush under screw tension. Polyurethane glue also requires mechanical scraping or mineral spirits for cleanup, and any uncured squeeze-out will stain nearby laminate surfaces.
| Characteristic | Type I/II PVA Wood Glue | Polyurethane Glue |
|---|---|---|
| Cure Mechanism | Water evaporation and absorption | Reaction with ambient moisture |
| Gap-Filling Ability | Minimal (shrinks slightly on drying) | Expands with foaming action |
| Open Assembly Time | 5 to 10 minutes | 15 to 20 minutes |
| Full Cure Duration | 18 to 24 hours | 24 hours |
| Cleanup Method | Warm water while wet | Mineral spirits or cured scraping |
| Best Application | Clean, snug-fitting dowel plugs | Loose holes or outdoor cabinets |
For standard indoor cabinet repair where you have drilled a crisp, accurately sized hole, yellow PVA wood glue remains the more dependable and user-friendly choice. If you work in a high-humidity environment or on exterior outdoor kitchen units made from marine-grade core materials, polyurethane offers superior resistance against water breakdown.
Re-drilling the Pilot Hole to Center
Once your dowel is trimmed flush, you face the most exacting part of the project: putting the screw back in the right spot. Why is placement so critical? Cabinet hinges operate on strict geometry. If your new pilot hole is off by even 1.5 millimeters, the hinge plate will sit crooked. When you remount the door, it will bind against its neighbor, sit tilted, or fail to latch completely.
Never attempt to force the screw directly into the hardwood dowel without a pilot hole. Hardwood dowels like birch and oak are dense. Driving a screw into solid end-grain without a pilot hole generates enough frictional heat and hydraulic pressure to snap the head clean off a brass or zinc-plated steel screw. Even a steel hinge screw will split the dowel open, ruining the repair you just spent hours completing.
To establish an accurate center, use the hinge mounting plate itself as your template:
- Hold the hinge mounting plate against the cabinet frame, aligning it with the manufacturer reference marks or the factory witness lines on adjacent panels.
- Insert an awl or a sharp nail through the hinge screw slot and tap it lightly with a mallet to punch a distinct divot directly in the center of the hardwood dowel.
- Use a self-centering drill bit, often called a Vix bit. This specialized tool features a spring-loaded outer guide sleeve with a beveled nose that seats into the countersink bevel of the hinge plate hole. As you push forward with your drill, the guide holds the internal drill bit aligned with the center of the hardware.
- If you do not own a self-centering bit, select a standard twist drill bit whose diameter matches the root diameter of your screw. The root diameter is the solid inner cylinder of the screw, measured between the valleys of the threads. For a standard number 8 cabinet screw, a 7/64-inch or 1/8-inch drill bit is typically appropriate.
- Drill the pilot hole straight into the punch mark to a depth matching the full length of the screw threads.
Before driving the screw home, rub its threads across a dry block of paraffin wax or an old bar of hand soap. This thin layer of lubricant reduces driving friction dramatically, allowing the steel threads to seat tight against the hinge plate without binding or galling.
Common Mistakes to Avoid
A simple repair can unravel quickly if you skip basic woodworking principles. Watch out for these frequent missteps:
- Driving screws with an impact driver: Impact drivers hit screws with thousands of rapid rotational blows per minute. While great for framing decks, they exert far too much torque for cabinet carcases and can strip a freshly cured hardwood plug in less than a second. Always use a manual hand screwdriver for the final seating turns.
- Using coarse drywall screws: Drywall screws are made from brittle, hardened steel designed to hold gypsum board to studs. They have narrow shanks that snap easily under the shear stresses applied by opening cabinet doors. Always use dedicated wood screws or truss-head cabinet hardware screws.
- Skipping the cure time: Wood glue feels dry to the touch on the surface after 30 minutes, but deep inside an airtight drilled hole, the chemical polymerization or water evaporation takes much longer. Hanging a heavy door before 18 to 24 hours have elapsed can pull the entire dowel clean out of the cabinet frame.
- Drilling through the exterior cabinet side: If you are working on an exposed finished end panel, forgetting to place a tape stop on your drill bit will leave an irreparable hole visible on the outside of your kitchen cabinetry. Always verify your panel thickness before spinning the drill.
Practical Next Steps
To tackle your sagging door, begin by clearing the contents of the cabinet and identifying every screw hole that shows signs of thread failure. Check both hinges on the door, because when one screw pulls loose, the remaining fasteners shoulder excess load and often develop micro-cracks that are not yet visible to the naked eye.
Collect your supplies before disassembling the hardware: a length of 3/8-inch birch dowel rod, PVA carpenter glue, a 3/8-inch brad-point bit, painter tape for a depth gauge, a sharp flush-cut saw, and a hand screwdriver. If the cabinet material around the hinge is extensively shattered across an area larger than an inch, standard dowel plugs may not provide sufficient support. In cases of catastrophic wall damage or structural rot, consult a professional cabinetmaker or explore metal hinge repair plates, which bypass the blown-out wood by anchoring to undamaged regions of the cabinet carcase further back.