
A drywall patch can feel perfectly smooth beneath your fingertips, yet look like an uneven mound once the wall is painted. You might run your hand across the repair and feel no ridges, only to turn on a lamp later that evening and see a distinct, circular bump staring back at you. This happens because our fingers are sensitive to texture, like rough paper or grit, but our eyes are sensitive to light and shadow. A repair that feels smooth can still sit an eighth of an inch proud of the surrounding drywall, and that tiny elevation is all it takes to catch the light.
Getting a patch to disappear does not require professional speed, but it does require an understanding of how drywall materials behave when they dry and how light travels across a flat plane. Drywall is simply a sandwich of crushed gypsum rock between two sheets of heavy paper. When you puncture it, you create frayed paper, crushed core material, and a gap that must be bridged. By preparing the edge of the hole correctly, choosing the right joint compound for each coat, and spreading that compound far wider than you think is necessary, you can make any repair blend into the surrounding surface.
Why Patches Bulge: The Shadow Problem
Why do so many drywall repairs look like soft hills on an otherwise flat wall? The issue usually begins with the tape and mud sitting on top of the drywall rather than flush with it. Factory drywall sheets are manufactured with tapered edges along their long sides. These tapers are shallow valleys designed specifically to hold reinforcing tape and joint compound without creating a rise. When you patch a hole in the middle of a wall, however, you do not have that factory recess. You are placing tape and mud directly over a flat plane.
Think of it like placing a sheet of cardboard on a hardwood floor and tossing a thin rug over it. Even if the rug lies smoothly without a single wrinkle, you will still see the outline of the cardboard underneath whenever the room gets angled light. Joint tape has thickness, and joint compound has body. If you pile that material over a four-inch hole and stop spreading the mud five inches from the center, you have built a tiny pyramid. The human eye cannot easily measure depth on a matte wall, but it immediately detects the line where light turns into shadow on the backside of that pyramid.
The solution is not to sand the patch down until it is paper-thin, because aggressive sanding often tears the reinforcing tape and weakens the joint. Instead, the solution is optical. You must stretch the slope of the compound out so far in every direction that the change in height happens over eight, ten, or twelve inches instead of one or two. When an incline rises only one-sixteenth of an inch over a distance of ten inches, the transition is so gradual that light washes over it without casting a distinct shadow.
Cutting Clean Bevels Around Damaged Gypsum
Before you mix any compound or touch a roll of tape, you have to address the perimeter of the break. When drywall breaks, the gypsum core crumbles and the face paper tears away from the rock. If you apply compound directly over torn, fuzzy paper, that paper absorbs water from the wet mud, swells, and bubbles upward. No amount of sanding can fix paper bubbles hidden beneath dried compound; they will simply pop open, leaving hollow craters that must be scraped out and patched again.
Take a sharp utility knife and cut a perimeter around the damage, removing any loose or soft gypsum. Once the opening is firm, carve a forty-five-degree bevel around the entire outer rim of the hole. What does this bevel accomplish? It creates a valley shaped like a wide V. Instead of forcing your repair material to stick to a blunt, vertical edge of drywall paper, the bevel pushes the cut edge of the paper back and creates a pocket for the joint compound to fill. It acts like a mortise joint in woodworking, anchoring the material into the meat of the board.
After carving the bevel, look closely at the paper face around the cut. If any paper fibers are frayed or peeling backward, slice them away cleanly with the utility knife. If the core gypsum is chalky and loose, brush away the dust with a dry paintbrush. For holes where the brown backing paper is exposed, apply a quick swipe of shellac-based primer or an oil-based sealing spray before applying water-based compound. This locks down the paper fibers and stops moisture from causing the paper to blister during the repair.
Setting Compound versus Drying Mud Explained
One of the most common reasons patches crack or shrink inward is using the wrong compound for the foundation layer. Walk into any hardware store and you will see pre-mixed buckets labeled "all-purpose" or "lightweight," alongside dry powder sacks marked with numbers like 20, 45, or 90. These two products do not work the same way, and using them interchangeably is a recipe for frustration.
Pre-mixed joint compound in a bucket is a drying-type compound. It consists of limestone, water, and vinyl binders. It hardens solely through evaporation. As the water leaves the mud and enters the room air, the volume of the compound shrinks significantly. If you pack a deep hole or an open seam with pre-mixed mud, the center will cup inward as it dries, often forming deep cracks. Furthermore, because it depends entirely on air contact to dry, mud applied thickly can take thirty-six to forty-eight hours to cure in a room with high humidity.
Setting-type compound, often called "hot mud," comes as a dry powder that you mix with water. It does not wait for water to evaporate. Instead, it hardens through an internal chemical reaction, much like concrete or plaster. As the crystals interlock, the material undergoes almost zero shrinkage, regardless of how thick you apply it. A patch packed with forty-five-minute setting compound will be rock-hard in under an hour, even if applied half an inch deep in a cold basement.
| Feature | Setting Compound (Powder) | Drying Compound (Ready-Mix Bucket) |
|---|---|---|
| Hardening Mechanism | Chemical crystallization | Water evaporation |
| Shrinkage Rate | Near zero | Noticeable shrinkage as water exits |
| Working Window | Strictly timed (e.g., 20, 45, or 90 minutes) | Indefinite if kept sealed and wet |
| Ease of Sanding | Very hard, difficult to sand smooth | Soft, sands easily with light pressure |
| Best Use | Pre-filling holes, setting tape, first coats | Second coats, skim coats, final finish |
The ideal strategy combines both materials to save time and prevent problems. Use setting compound to pack the open bevel and bed your reinforcing tape. Because it support hard and does not shrink, it builds a solid, immovable bridge across the break. Once that initial chemical coat is solid, switch to lightweight pre-mixed compound for the wide top coats. The pre-mixed mud is much softer, making it easy to sand into a feathered perimeter that disappears into the existing wall paint.
Feathering the Edges with a Wide Taping Knife
Feathering is the technique of spreading joint compound so thin at its outer boundary that the layer diminishes to zero thickness. This is where most DIY repairs fall short, typically because homeowners try to complete the entire job with a single four-inch putty knife. A narrow knife can push mud into a hole, but it cannot flatten a repair against the surrounding wall. You need wider steel blades to bridge the gap between the new patch and the undisturbed drywall.
To produce an invisible patch, assemble three knives: a flexible six-inch taping knife, a ten-inch knife, and a twelve-inch knife. The repair proceeds through distinct layers of application.
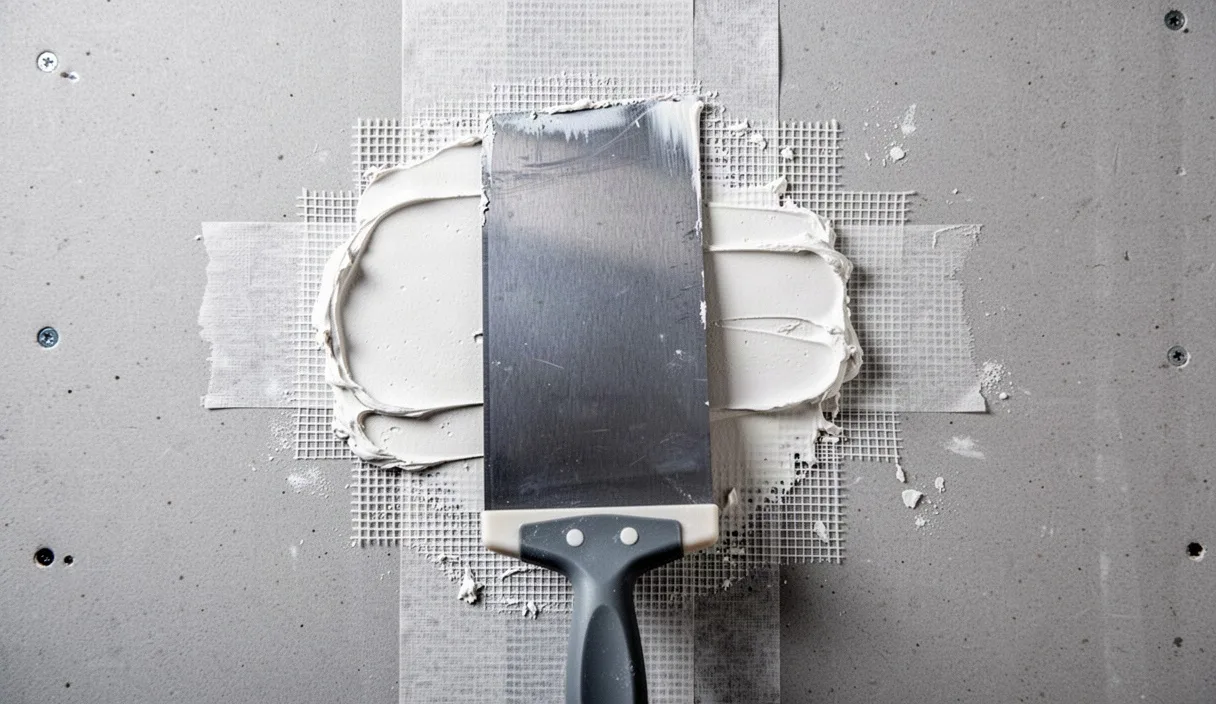
- Embedding the tape: Using the six-inch knife, press setting compound firmly into the beveled void. Lay paper tape or fiberglass mesh tape over the wet compound. Hold your knife at a forty-five-degree angle and draw it across the tape with firm pressure, squeezing out excess mud from behind the tape until the tape sits as close to the wall as possible without tearing. Allow this foundation to cure completely.
- The fill coat: Switch to your ten-inch knife and all-purpose or lightweight compound. Scoop mud onto the blade and lay down a band across the entire patch, extending roughly three to four inches past the edge of the tape on all sides. Hold the knife at a shallower angle, around thirty degrees, so you leave a light layer of compound over the tape rather than scraping it bare.
- Feathering the perimeter: This step controls the height. Place your index finger near the outer corner of the blade, applying pressure exclusively to the outside edge of the knife that rides on the undamaged drywall. Keep the inside edge of the blade, which rides over the patch, relaxed with minimal pressure. Pull the knife around the perimeter of the patch. The pressurized edge scrapes the compound flush against the old wall, while the relaxed edge leaves a smooth, tapered ramp over the repair.
- The final skim: Once the second coat is dry, scrape away any small ridges using the dry blade of your knife. Do not sand yet. Take the twelve-inch knife and apply a thin, almost translucent layer of lightweight compound extending another three to four inches beyond your previous boundary. Feather all outer edges down to nothing. When applied correctly, you should be able to see the old wall paint through the outer two inches of the wet compound.
Keep your tools clean as you work. A tiny dried crust of compound on the edge of your steel blade will leave deep gouges through wet mud with every pass. Wipe your blades with a damp sponge or scrape them against a secondary knife frequently to keep the working edge clean and straight.
Checking Your Work with Cross-Light Before Paint
Standard room lighting is the enemy of drywall inspection. Overhead ceiling fixtures cast light straight down, which illuminates high spots evenly and hides shallow dips. If you sand your patch under normal room lighting, it may look flawless, but the moment a table lamp is turned on nearby or morning sun enters a window, every imperfection will show.
To inspect your work accurately, darken the room slightly and grab a bright handheld work light or an LED flashlight. Place the light directly against the wall, about twelve inches away from the patch, and aim the beam across the surface horizontally. This is called cross-lighting or raking light. Any bump, ridge, knife lap, or pinhole will immediately cast a long, dramatic shadow across the wall surface. Depressions will look like dark valleys, and proud ridges will glow like illuminated mountains.
Hold a pencil in your free hand while shining the light from different angles, both horizontally from the left and right, and vertically from below. Lightly circle any defects with the pencil. If you see a high ridge, mark it for light sanding. If you see a depression where the light fails to hit, do not try to sand the entire wall down to match it; make a pencil note to fill that spot with a tiny dab of lightweight compound.
When sanding, use a firm sanding block rather than holding sandpaper loosely in your fingers. Sandpaper held directly in the palm of your hand flexes into depressions, hollowing them out further while rounding off high spots. A hard sanding block bridges across the high spots, cutting them flat. Use a fine 150-grit to 220-grit abrasive screen or paper, and use circular, gentle motions. Your goal is simply to remove ridges, not to remove the mud that bridges your patch. Once the cross-light shows a smooth wash with no hard shadow lines, the patch is ready for a dedicated drywall primer.
Common Mistakes to Avoid
Small errors during the early moments of a repair often compound into visible flaws by the time the paint dries. Here are the most frequent mistakes that disrupt an otherwise solid repair:
- Skipping the primer before painting: Drywall mud has a much higher porosity than the surrounding painted surface. If you apply finish paint directly over unprimed compound, the patch drinks in the paint binder rapidly, drying to a different sheen than the rest of the wall. This is called "flashing." Always coat the patch with a dedicated drywall primer-sealer first.
- Over-sanding the edges: Trying to make the patch smaller by aggressively sanding the edges usually scuffs the surrounding wall's paper face, causing it to tear and pill. If an edge looks too thick, do not dig into it with heavy-grit paper; feather another thin layer of compound outward with a wider knife instead.
- Using fast-setting mud for the final coat: Setting compounds dry extremely hard and are stubborn to sand. If you use hot mud for your final skim coat, you will likely sand away the soft existing drywall paper around the repair before you succeed in leveling the hardened compound patch itself.
- Applying compound too thick in one pass: Piling on thick layers in hopes of finishing in one coat leads to sagging, cracking, and very long drying times. Three paper-thin coats will always yield a flatter, more reliable surface than one heavy coat.
Practical Next Steps
Before beginning your repair, clear the area and prepare your supplies. Pick up a bag of setting compound, a tub of lightweight finishing compound, a roll of paper tape, and a set of flexible taping knives. If you are dealing with a standard hole from a door handle, wall anchor, or plumbing access cut, clear away furniture and drop a canvas tarp beneath the work area to catch gypsum dust.
If the hole you are addressing was caused by ongoing structural movement, such as a foundation settling crack that reopens every season, or if the drywall has been damaged by active water leaks, patching the surface will only hide the issue temporarily. In those situations, repair the source of the moisture or consult a structural carpenter or licensed general contractor to address the frame movement before closing the wall.
Take your time on the prep work. Bevel the edges, secure any loose paper, let each coat cure fully before evaluating the surface, and always inspect with raking light. By taking the time to feather the compound well past the damaged area, you ensure that the patch disappears into the background, leaving the wall completely flat to both the hand and the eye.