
Leather goods often outlast their owners, but the thread holding them together rarely does. When an old briefcase or a pair of work boots falls apart, the leather itself is usually intact while the seam has unravelled into a row of empty holes. Factory-made leather items rely almost exclusively on sewing machines because machines work quickly. Yet, machine construction introduces a structural vulnerability that hand work avoids entirely. Understanding how thread interacts with thick, fibrous hides is the difference between a seam that splits after two years and one that survives decades of daily use.
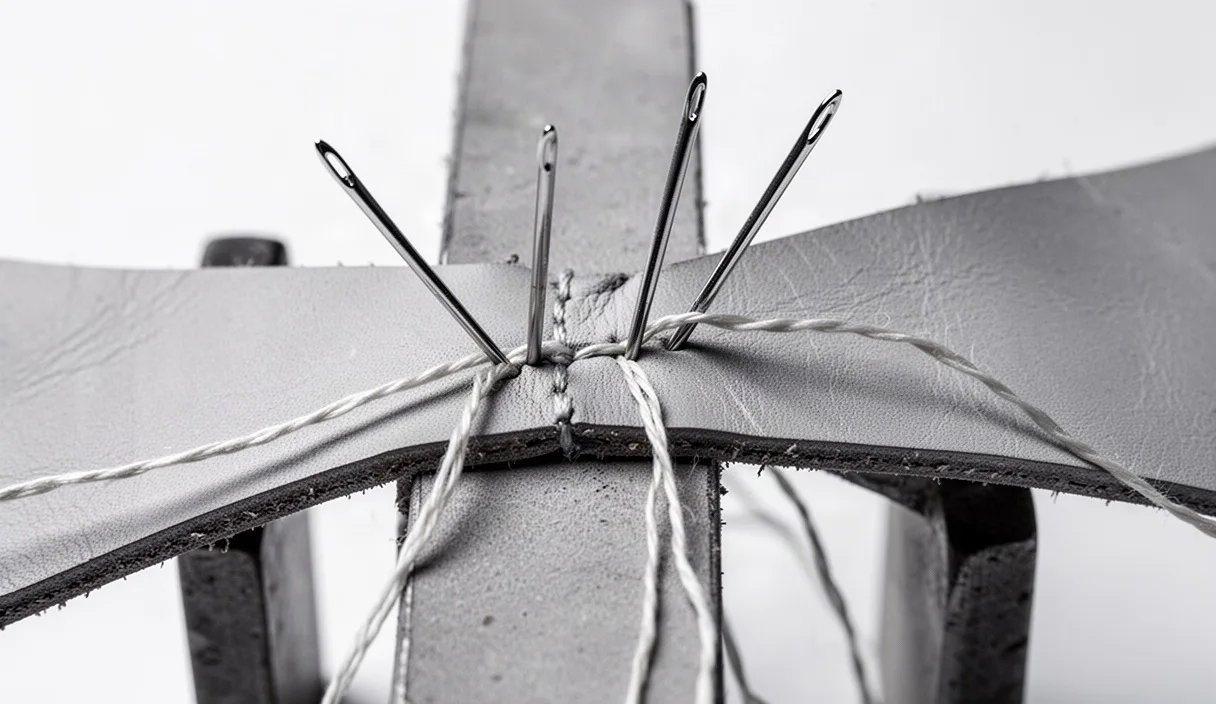
The traditional saddle stitch is the foundation of durable leatherwork. It relies on a single length of waxed cord with a blunt needle attached to each end. Both needles pass through the exact same hole from opposite directions, creating two continuous, interlocking lines of thread that run parallel through the leather. Learning this technique requires patience and coordination, but the mechanical logic behind it is simple. Once you master the rhythm of the needles, you can assemble belts, wallets, and bags that will never pull apart from a single broken loop.
Why Machine Stitches Fail Before Saddle Stitches
Why does a machine-sewn seam disintegrate so quickly once a single thread snaps? Sewing machines create what is called a lockstitch. A machine pushes an upper needle through the leather to meet a bobbin thread underneath. The two threads twist around each other inside the hole, like two people hooking their index fingers together through a crack in a fence. Neither thread ever crosses over to the other side of the material; the top thread stays on top, and the bottom thread stays on the bottom. If friction wears through the top thread at any point along the seam, the interlocked loops lose their anchor. With nothing holding the bobbin thread in place, the entire row can unravel like a pulled thread on a knitted sweater.
The saddle stitch behaves completely differently because each half of the thread travels all the way through the leather on every stitch. Instead of two loops catching each other in the middle of the hide, you have two complete running stitches moving in opposite directions. Think of two hikers walking along a narrow trail from opposite ends, crossing paths at regular markers along the way. If one hiker stops or twists an ankle, the other hiker is still standing on the trail. If surface abrasion cuts the exterior thread on a saddle-stitched wallet, the thread running through the opposite side still binds both layers of leather together. The friction between the leather fibers and the wax coating keeps the broken ends pinned firmly inside the hole.
| Feature | Machine Lockstitch | Hand Saddle Stitch |
|---|---|---|
| Thread construction | Two separate threads meeting in the middle | One continuous thread with two needles |
| Failure behavior | Entire seam unravels if one loop breaks | Damage stays isolated to the single broken stitch |
| Hole profile | Round puncture made by an awl or needle | Angled slit produced by pricking irons |
| Thread tension | Set mechanically, prone to uneven balance | Set manually by the maker on every pass |
| Reparability | Difficult to backstitch cleanly over old holes | Easy to rework by hand using existing holes |
Because leather does not stretch or spring back the way woven cloth does, hole shape also dictates stitch longevity. Sewing machines pierce round holes, which push leather fibers apart and leave gaps where dirt and water can collect. A hand saddle stitch uses angled slits cut with a chisel. When the threads pull against the corners of these slits, the leather closes around the thread, sealing the seam against moisture and grime.
Marking Spacing with Pricking Irons
You cannot push a blunt harness needle through tough vegetable-tanned leather without preparing the path first. How do you create perfectly uniform holes along a curved pocket or a straight belt edge? You use a set of pricking irons, sometimes called stitching chisels. These are steel tools that look like heavy dining forks, ground with razor-sharp teeth set at an angle, usually between 40 and 45 degrees. When driven into the leather with a mallet, they cut a row of neat, slanted slits that direct the angle of your thread.
Before touching the irons, you must mark a stitch line parallel to the edge of your project. Use a wing divider, a metal compass with two hardened steel points. Set the distance between the tips to 3.5 mm or 4 mm, depending on the thickness of your leather. Place one tip against the finished edge of the leather and drag the other point along the grain with light, steady downward pressure. This leaves a faint, straight crease that serves as your alignment track. Do not cut deep into the grain; you only need a visual guide for the teeth of your iron.
To punch the holes consistently, follow these specific actions:
- Position your project flat on a high-density poly cutting board. Never strike irons against steel, stone, or bare wood, as this dulls or snaps the delicate teeth.
- Align the first tooth of your multi-tooth iron on your marked line. Hold the iron strictly vertical, checking both forward-and-back and left-to-right tilt. If the iron leans, the holes on the backside will wander off course.
- Strike the top of the iron squarely with a wooden, rawhide, or polyurethane mallet. Avoid steel hammers, which mushroom the strike end of your tools. Aim for a solid strike that pierces completely through all glued layers.
- Pull the iron straight up out of the leather. Rocking it side to side enlarges the slits and distorts the surface.
- To keep spacing identical across the entire seam, place the first tooth of the iron into the last hole you just punched before striking again. This overlap guarantees that your hole intervals never drift.
Use a two-tooth iron when navigating tight corners and switch back to an eight-tooth or nine-tooth iron for long, straight runs. The angle of the slits determines the classic slanted appearance of the finished stitch, so make certain that the teeth slant in the same direction along the entire length of your piece.
Threading Two Harness Needles on Waxed Thread
Stitching leather with fabric needles will lead to frustration. Tailoring needles have sharp points that split leather fibers and pierce through the thread itself as you pass through a crowded hole. Harness needles, by contrast, feature rounded, blunt tips that slide around obstacles and seek out the open space in a pre-punched hole. Size 2 or size 4 harness needles match well with thread thicknesses between 0.5 mm and 0.8 mm, which are standard dimensions for small goods like cardholders and notebook covers.
How much thread do you pull from the spool? As a standard rule, cut a piece of thread equal to four times the length of the seam you plan to stitch. If your leather is unusually thick, such as three layers of heavy 4 mm bridle leather, increase that allowance to five or six times the seam length. Running short of thread mid-seam creates unnecessary repair work, while cutting an excessively long thread increases tangles and wears away the protective wax coating as you pull yard after yard through abrasive hole edges.
To lock the needles onto the thread so they cannot pull loose during stitching, follow this secure method:
- Pass one end of your thread through the eye of the needle, pulling roughly 50 mm of thread through.
- Take the short tail of the thread and pierce the sharp tip of your needle directly through the center of the braided cord, about 15 mm down from the cut end.
- Slide the pierced loop down the shaft of the needle, pushing it over the eye and onto the main body of the thread.
- Grasp the long section of the thread and pull it firmly. The pierced tail will fold down against the eye, forming a compact, self-locking knot that cannot slide backward.
- Repeat the exact process with the second needle on the opposite end of the thread.
Waxed thread is mandatory for this work. You can buy pre-waxed braided polyester thread, which holds up against moisture and UV light, or traditional linen thread coated with pure beeswax. The wax lubricates the passage through dense leather, prevents internal thread fraying, and helps each stitch stay locked at the tension you set without slipping back while you prepare the next pass.
Casting the Thread for a Consistent Slant
A beautiful saddle stitch looks like a row of small, uniform roof shingles, each thread resting at the exact same diagonal angle across the front face. Achieving this appearance requires a repeatable set of physical motions known as casting. Place your leather securely inside a wooden stitching pony clamped to a table or held between your thighs. Orient the work so the visible front face of your project faces toward your dominant hand, and the seam runs horizontally or vertically according to your comfort.
Begin by pushing your first needle through the starting hole. Pull the thread through until you have equal lengths on both sides of the leather. From this point forward, every single stitch must follow the exact same choreography. Decide which needle enters the hole first and keep that order consistent until the seam is finished. In the traditional English style, the needle on the front side enters first.
Push the front needle through the bottom corner of the slanted slit. As the tip emerges on the back side, grip it with your non-dominant fingers and pull it through about halfway. Do not pull it all the way tight yet. Bring your second needle from the back side toward the same hole. You must insert this second needle into the upper corner of the slit, above the thread that is already resting in the passage. Before pushing it through, pull the first thread back lightly toward your body. This tension prevents the second needle from piercing the fibers of the first thread.
Now perform the cast. As the second needle clears the hole toward the front, drop the first thread over the shaft of the second needle, creating a simple loop or half-hitch. When you draw both needles outward to set the stitch, this cast forces the knot to seat itself in the identical corner of the hole every time. Pull both hands outward with equal, steady firmness at a 45-degree angle to the seam line. Do not yank; a calm, controlled pull sets the thread deep into the leather grain without buckling the edge of your project.
Locking and Trimming Your Terminal Stitches
Unlike sewing on a garment, you never finish a leather saddle stitch by tying a visible overhand knot. Knots look unrefined, catch on clothing, and work themselves loose under abrasion. Instead, you secure the seam by backstitching through the last two or three holes you already punched. The friction of the leather, combined with the double volume of waxed thread packed into those final slits, locks the assembly permanently.
When you reach the final hole of your seam, perform your normal stitch and cast. Then, turn your needles around and sew backward into the second-to-last hole. Push the first needle through, taking care to avoid piercing the thread already occupying that space. Bring the second needle through from the other side. Pull both sides tight. Move back one more hole and repeat the process. Because these holes now hold two passes of thread, the fit will be snug. You may need to wiggle the blunt needles through or assist them with smooth-jawed leather pliers.
Once you have completed two or three backstitches, both threads should be pulled firmly to set the final tension. How you trim the remaining thread depends on the material you chose:
- For synthetic threads like polyester or nylon, trim the thread with sharp snips, leaving roughly 1.5 mm of tail protruding from the leather surface. Touch the glowing tip of a thread burner or the low flame of a lighter to the stub. The plastic melts instantly into a small bead. Quickly press this molten bead down with the flat metal face of your lighter, cementing it flush against the leather hole.
- For natural linen threads, do not use an open flame, as linen will burn into ash rather than melt. Pull the thread taut, slice it completely flush against the surface using an angled utility knife, and apply a pinhead droplet of leather craft glue or hide glue into the opening with a toothpick.
Finish the entire seam by resting the stitched piece on your bench and rolling over the line with an overstitch wheel, or tapping it gently with a polished, flat-faced cobbler hammer. This simple step closes the cut fibers around the thread, smooths down high spots, and seats the waxed cord flush with the surface of the hide.
Common Mistakes
Stitching errors are easy to diagnose because leather creates an unforgiving record of every movement. If you notice flaws in your work, check your routine against these frequent pitfalls:
- Piercing the thread: If your second needle spears the core of the first thread inside the hole, you cannot pull the stitch tight, and unpicking the mistake becomes difficult. Always pull the first thread backward toward your body to create clear clearance before sliding the second needle through the opening.
- Switching needle priority: If the stitches slant beautifully for six inches and suddenly change direction, you swapped your hands. If the left needle goes in first, it must go in first for every hole on that project without exception.
- Uneven hand tension: Pulling hard with your left hand and gently with your right hand causes the seam to bias toward one side, leaving puckers or wavy edges along the leather perimeter. Pull both arms away from the leather with matching force.
- Using the wrong mallet: Striking steel pricking irons with a steel workshop hammer ruins tools quickly by bending teeth and mushrooming the striking handle. Use only nylon, urethane, or weighted wood mallets.
- Neglecting edge finishing first: Sanding and beveling your edges after you stitch risks cutting the thread with your edge beveler or sandpaper. Always prepare, bevel, and dye your leather edges before passing needles through the holes.
Practical Next Steps
The best way to build muscle memory for the saddle stitch is to create a dedicated practice strip. Take two scraps of medium-temper vegetable-tanned leather, about 2 mm thick and 200 mm long. Glue them grain-side out using water-based contact adhesive, press them flat, and let the bond support twenty minutes. Scribe a stitch line 4 mm from the edge, punch your holes carefully using your pricking irons, and clamp the strip into your stitching pony.
Work through the strip without rushing. Focus purely on consistent posture: needle insertion angle, needle crossover, the cast, and outward pull tension. Once you finish the line, inspect both sides in good lighting. If the backside slants neatly at the same pitch as the front, your hand positions are correct. If the backside looks erratic, your needle entry order varied from hole to hole. Adjust your rhythm on a second scrap strip until the movements feel natural.
Finally, note that structural leather projects like structural vehicle restraints, heavy-duty climbing gear, or load-bearing equestrian saddles carry specific life-safety requirements. For high-risk applications, always consult a certified professional saddler or industrial rigger to verify the appropriate thread tensile ratings, leather weights, and seam construction standards before putting your handmade gear into use.