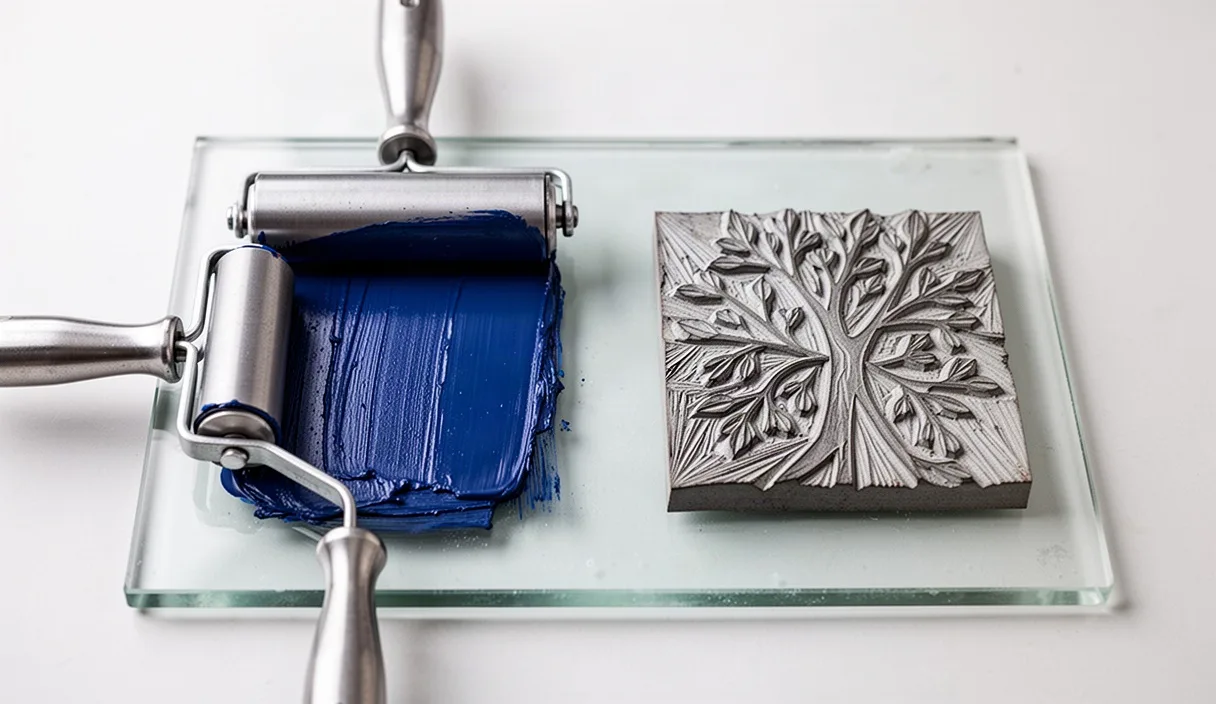

Every linocut print begins with a simple mechanical task: you spread a thin layer of ink across a carved linoleum block, lay a sheet of paper on top, and press them together. Yet anyone who has pulled more than three prints knows that the ink you choose dictates nearly every physical movement in your studio. It governs how quickly you have to work, how hard you push your brayer, which papers will tear under the roller, and what you smell while working at your table.
The printmaking market divides relief inks into two primary families: water-based and oil-based formulations. While water-soluble oil inks have emerged as a hybrid alternative, the functional divide between pure water carriers and pure oil carriers remains the foundation of print shop chemistry. Choosing between them is not simply a matter of convenience or personal taste. It is an engineering choice about how liquid behaves on a slab, how pigment binds to paper fibers, and how you manage the drying process in your working space.
How Ink Transfers from Block to Paper
How does ink actually move from the flat surface of your carved block into the microscopic crevices of a sheet of paper? The answer comes down to two physical properties: viscosity and tack. Viscosity describes how thick a fluid is, or how much it resists pouring, much like cold honey compared to warm water. Tack, on the other hand, describes the stickiness of the ink, which is its resistance to being pulled apart when two surfaces separate. When you ink a block, you are creating a liquid bridge between your brayer and the linoleum, and then another bridge between the linoleum and your paper.
Water-based inks use water, glycerin, and water-soluble gums like dextrin as their vehicle. The vehicle is the liquid that suspends the dry pigment particles so they can be spread. Because water has high surface tension and low internal cohesion, water-based inks tend to have low tack. When you roll a water-based ink onto a linoleum slab, it can slip across smooth spots or bead up if the linoleum has any residual factory oils on it. Under printing pressure, water-based ink releases readily from the linoleum, but it can squash outward at the edges of your carved cuts if you apply slightly too much pressure, resulting in blurred outlines.
Oil-based inks use drying oils, primarily boiled linseed oil, as their vehicle. Linseed oil has natural fatty acids that give it a rich, buttery consistency and significant tack. When you pull a charged roller across linoleum with oil ink, you hear a characteristic hiss, like the sound of adhesive tape being slowly peeled from glass. This tack holds the ink firmly to the ridges of the block. When paper presses down, the oil-based film splits evenly: half remains on the block, and half transfers to the paper. Because the oil film holds its structure under pressure, your carved lines stay sharp and crisp, without the squished borders that often plague water inks.
Open Time: Why Speed Matters on the Slab
What is open time, and why does it change how you carve and print? In printmaking, open time refers to the window of minutes or hours during which an ink remains wet, workable, and tacky on your glass inking plate without changing its consistency. Once an ink begins to dry on the slab, you can no longer roll out a smooth, micro-thin film. Instead, the ink becomes gummy, gathers into lumps, and tears fibers out of your paper.
Water-based inks dry through simple evaporation. The water molecules in the ink leave the slab and enter the surrounding air. In a dry room with 30 percent relative humidity, a thin ribbon of water-based ink can become unusable on your slab in four to seven minutes. If you are printing a large multi-block print where you must carefully register three separate linoleum plates, seven minutes can vanish before you even align your paper guides. You must either work at high speed, mist your workspace with water, or mix a small amount of liquid retarder, usually propylene glycol, into the ink to slow moisture loss.
Oil-based inks do not dry by evaporation. Instead, they dry through oxidation, a chemical reaction where unsaturated fatty acid chains in linseed oil absorb oxygen from the air and cross-link into a solid, rubbery polymer. This chemical reaction occurs very slowly. An oil-based ink on a glass slab typically provides an open time of 12 to 24 hours. You can ink a block, step away to make lunch, answer an email, return to your press an hour later, and pull an identical print without the ink crusting or stiffening. For detailed, large-scale, or multi-color work, this prolonged open time removes frantic rushing from the printing routine.
Pigment Density and Color Depth Differences
The visual impact of a dried linocut print relies on how much dry pigment rests on the paper and how the dried vehicle lets light pass through to those pigment grains. Water-based and oil-based inks handle this light reflection quite differently, which produces distinct finishes on the dried print.
Because water-based binders dry solely by losing volume through evaporation, the film shrinks drastically as it sets. As the water leaves, the gum binder contracts, pulling the pigment particles flat against the paper sheet. This leaves a matte, chalky surface. While this flat finish can look attractive on graphic poster designs, it often lacks visual depth. Black water-based inks often dry to a soft charcoal or slate gray rather than a deep, velvet black. Adding more water-based ink to solve this problem usually backfires: excess gum dries shiny in patches and can crack if you bend the paper.
Linseed oil support without losing mass, because it absorbs oxygen rather than evaporating away. The resulting oil-paint film retains its physical thickness and forms a continuous, clear glaze around the pigment particles. This glaze allows light to penetrate down into the pigment layer and reflect back out, creating rich optical saturation. Blacks appear dense and pitch-dark, while mixed colors maintain their luminosity. If you print a transparent layer of oil ink over another color, you get a clean third color through optical blending, whereas overlapping water-based inks can partially dissolve the lower layer, resulting in muddy prints.
| Property | Standard Water-Based Ink | Traditional Oil-Based Ink | Water-Washable Oil Ink |
|---|---|---|---|
| Drying Mechanism | Evaporation (water loss) | Oxidation (polymerization) | Oxidation (polymerization) |
| Working Open Time | 4 to 10 minutes | 10 to 24 hours | 4 to 8 hours |
| Surface Sheen | Flat matte, sometimes chalky | Satin to low-gloss luster | Satin |
| Cure Time on Paper | 15 to 45 minutes | 3 to 7 days | 2 to 5 days |
| Primary Binder | Dextrin, gum, or acrylic | Boiled stand oil (linseed) | Modified plant oils |
Cleanup Comparison: Soap versus Solvents
How you clean your tools affects your daily routine, your studio layout, and your health. The chemical bond holding the ink together dictates what substance you need to break it down once printing ends. An ink designed to dissolve in water will yield to water, whereas an oil-based film requires a surfactant or a solvent to loosen its sticky grip.
Water-based inks provide the simplest cleanup process. Because the binder dissolves in moisture, you only need warm water, a kitchen sponge, and mild dish soap. You wash your brayer, glass inking plate, and linoleum block in an ordinary sink. The ink washes down the drain without leaving sticky residues, and the entire cleaning process for a typical session takes under five minutes. This makes water-based ink a standard option for classrooms, dining room tables, and shared spaces without dedicated ventilation systems.
Traditional oil-based inks cannot be cleaned with water alone. For decades, printmakers reached for mineral spirits, turpentine, or odorless paint thinners. While effective, these solvents release volatile organic compounds that irritate lungs and create fire risks in closed rooms. Fortunately, printmakers discovered that you can break down oil ink without toxic solvents by using ordinary vegetable cooking oil, such as canola or corn oil, followed by an alcohol spray or dish soap.
To clean traditional oil ink safely using the vegetable oil method, follow these deliberate actions:
- Scraping the residue: Use a putty knife or a piece of stiff cardboard to collect excess wet ink from the glass slab, wiping the tool onto scrap paper for dry disposal.
- Dissolving the vehicle: Pour a teaspoon of ordinary vegetable oil directly onto the slab and roll your brayer through it. The thin cooking oil dilutes the sticky linseed oil, turning the tacky film back into a loose liquid.
- Wiping the slab and tools: Wipe down the glass slab, the brayer roller, and your linoleum block using blue shop towels or cotton rags until no visible pigment remains.
- Degreasing the surfaces: Mist the slab and block with a mixture of half water and half mild dish detergent, or household isopropyl alcohol, and wipe dry with a clean rag to remove the oily film.
Whenever you work with oil-soaked rags, remember that linseed oil generates heat as it oxidizes. Piling crumpled, oil-soaked rags in a trash can creates a real risk of spontaneous combustion. Always lay oil-soaked rags flat on a concrete floor to dry completely, or store them submerged in a sealed, water-filled metal container before disposal.
Matching Ink Chemistry to Your Paper Weight
A print is not merely ink sitting on top of paper; it is a structural partnership between ink chemistry and paper fibers. If the ink pulls harder than the internal strength of the paper, the sheet tears. If the ink contains more moisture than the paper can absorb, the sheet warps out of shape. Choosing an ink requires looking at the weight and sizing of your paper stock.
Paper weight is measured in grams per square meter, abbreviated as gsm. Lightweight printmaking papers, such as Japanese kozo, kitakata, or awagami papers, generally fall between 30 gsm and 70 gsm. These sheets are hand-formed or machine-made from long plant fibers that are delicate yet supple. Water-based inks often ruin thin papers. The water in the ink swells the raw cellulose fibers instantly, causing the sheet to cockle, which means it ripples like bacon in a hot pan. When you try to smooth the rippled sheet onto your block, it wrinkles and forms permanent creases.
Oil-based ink, by contrast, suits lightweight papers exceptionally well. The oil does not saturate or soften plant fibers the way water does. Instead, it rests on the fiber surface. Because thin papers are flexible, you can burnish them lightly with an inexpensive hand baren, a flat wooden spoon, or your clean fingertips, pressing the paper into the tacky ink without stretching the sheet. The oil anchors the paper fibers cleanly, creating an even, crisp impression even on paper thin enough to read through.
Heavy Western rag papers, ranging from 200 gsm to 300 gsm (such as BFK Rives, Somerset, or Arches), present the opposite challenge. These papers are thick, rigid, and typically contain sizing, which is a starch or gelatin coating that repels fast liquid absorption. While water-based inks sit poorly on sized paper, oil-based inks bond deeply with heavy cotton rag. For very thick papers, the tack of oil ink must be tempered: if the ink is too sticky, it can pull off the top layer of paper fibers, a problem called plucking. You can fix plucking by adding a drop of raw linseed oil or low-viscosity plate oil to your slab to soften the ink before charging your block.
Common Mistakes When Working with Linocut Inks
Printing problems usually trace back to handling the ink improperly on the slab rather than carving errors on the linoleum. Recognizing these slip-ups helps you correct them before spoiling expensive paper sheets.
- Over-inking the slab: Beginners often roll out too much ink, thinking a thicker layer creates a darker print. Too much ink creates an orange peel texture on your slab and fills the fine details of your block. If you hear a loud, wet squelch when using your brayer, you have too much ink. Roll off the excess on scrap paper until you hear only a faint, gentle hiss.
- Inking with dry patches on the roller: Moving the brayer in only one direction creates stripes of uneven ink thickness. Always roll in an alternating grid pattern, rolling forward, lifting the brayer, turning it 90 degrees, and rolling again until the ink film on the roller is completely uniform.
- Using damp paper with water-based inks: While oil-based inks printed on an etching press sometimes benefit from slightly dampened paper, water-based relief inks will bleed and feather if the sheet has any dampness. Always print water-based inks onto bone-dry paper.
- Ignoring ambient temperature: Oil inks stiffen and resist smooth rolling in a cold room below 18 degrees Celsius (64 degrees Fahrenheit). Water inks evaporate twice as fast in a room with an active radiator or blowing fan. Adjust your space or add a small drop of oil or retarder to balance your room conditions.
Practical Next Steps for Your Print Session
To choose the right path for your current project, assess your physical workspace and the paper you want to use. If you work at a kitchen counter without cross-ventilation, share your room with children or pets, and print on standard 120 gsm drawing paper, start with a high-grade water-based block printing ink. Avoid student-grade tubes that list water as the main ingredient without sufficient gum binders, as these will yield faint, dusty images.
If you have a dedicated corner where prints can dry undisturbed on a rack for four to six days, and you want to use fine Asian washi papers or heavyweight 250 gsm cotton rag, choose an oil-based ink. To skip solvent cleanup entirely, buy a tube of water-washable oil ink. These inks contain real linseed oil that has been chemically altered with an emulsifier, giving you the long open time, rich black values, and tack of classic oil ink, while washing up with ordinary dish soap and warm water.
Before beginning an edition, set out your glass slab and roll a line of ink no wider than your brayer. Roll it out into an even square until the surface looks like smooth velvet. Take one sheet of your chosen paper, lay it down, rub it gently with the back of a wooden spoon, and pull your test proof. Check the carved edges under bright side lighting: if the edges bleed, strip ink away; if the center appears patchy or salt-and-pepper, add a dime-sized amount of ink and roll again. Adjusting your ink on the slab takes two minutes, but it protects every hour you invested in carving your block.