
A dull kitchen knife is far more dangerous than a sharp one. When a blade loses its biting edge, you naturally press down harder against the cutting board to force the steel through an onion or a carrot. That downward force turns unpredictable the moment the slick skin of a tomato deflects the rounded metal, sending the edge slipping toward your guiding fingers. Sharpening on a flat stone restores predictability to the kitchen bench, turning prep work back into a controlled, clean cutting motion.
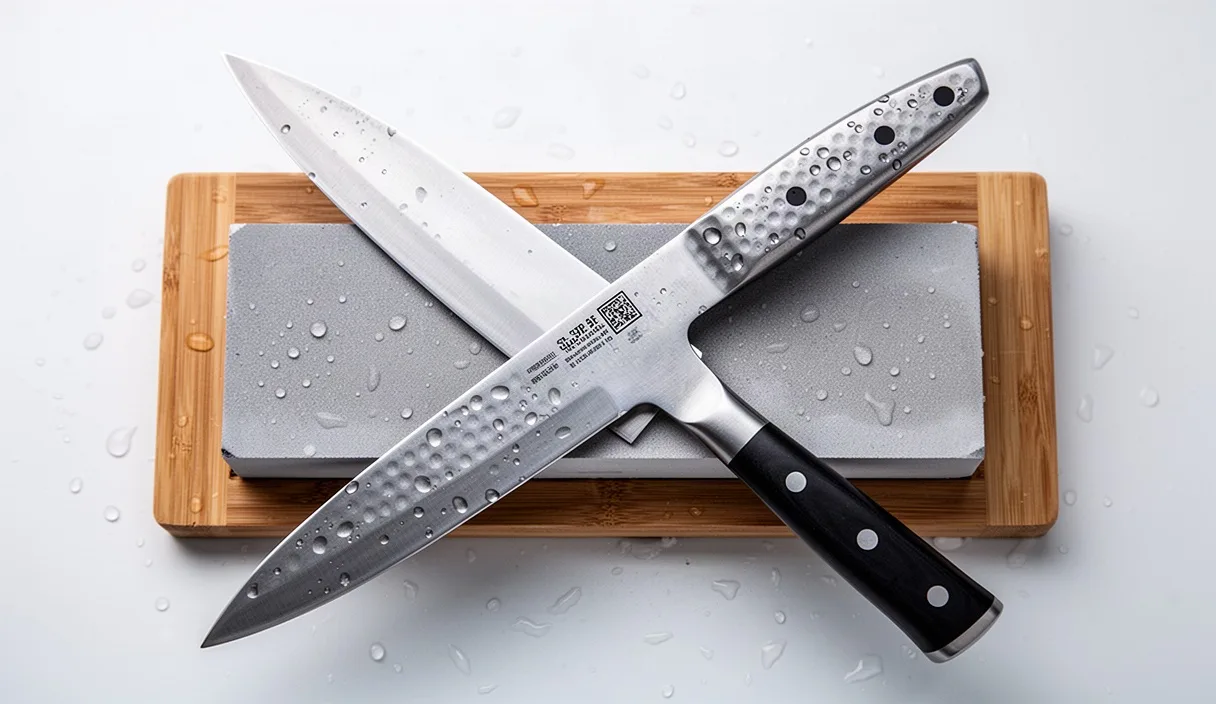
Many cooks shy away from whetstones because they seem complex or delicate. In reality, a whetstone is simply a controlled block of grit that grinds away worn metal until two flat planes meet at an acute line. You do not need expensive machines or elaborate guides to get a kitchen knife working properly. With an understanding of how metal forms an apex, a steady hand, and a little water, you can reshape and refine any carbon or stainless steel chef knife at your own workbench.
The Anatomy of an Edge: From U-Shape to V-Shape
What actually happens when a knife goes dull? If you look at the cross-section of a factory-sharp knife blade under a microscope, the two broad faces of the blade taper down to meet at a sharp point, resembling a sharp letter V. As you slice into food and repeatedly strike the surface of a wooden or plastic cutting board, that delicate apex bends, folds over, and chips away on a microscopic scale. Over weeks of daily cooking, that crisp V-shape wears down into a rounded, blunt U-shape.
Honing rods, which are often mistakenly called sharpening steels, only straighten the bent parts of that U-shape. They do not remove metal to rebuild the point. To return a knife to true sharpness, you must grind away the shoulders of that U-shape until the left face and the right face cross each other again at a crisp, crisp apex. This process is called stock removal, and it is the foundational job of an abrasive stone.
| Edge Condition | Microscopic Profile | Behavior on Food | Correct Maintenance Tool |
|---|---|---|---|
| Factory Sharp | Narrow V-shape | Bites immediately into waxy skins without sliding | None needed; keep clean and dry |
| Misaligned | Wavy or folded tip | Catches unevenly; tears soft herbs | Ceramic or smooth steel honing rod |
| Worn Dull | Rounded U-shape | Crushes tomato skin; requires heavy downward push | Medium-grit whetstone (800 to 1200 grit) |
| Chipped or Damaged | Notched profile | Hangs on fibers; skips across produce | Coarse-grit whetstone (220 to 400 grit) |
The angle at which these two faces meet determines how the knife balances durability and cutting speed. Most Western chef knives, such as German blades made from softer stainless steel, are sharpened at an angle between 18 and 22 degrees per side. Many Japanese blades use harder, higher-carbon alloys that can support a steeper, more acute angle between 12 and 15 degrees per side. The narrower the angle, the easier the blade glides through dense vegetables, but the more fragile the thin edge becomes against hard surfaces like bone or frozen food.
Soaking Water Stones and Preparing the Slurry
Synthetic whetstones fall into two broad groups: soaking stones and splash-and-go stones. Soaking stones, often made of aluminum oxide bound with a clay or resin matrix, contain internal air pockets that must absorb water before use. If you rub dry steel against a thirsty soaking stone, metal dust packs deep into the porous matrix, permanently clogging the abrasive grains in a process called loading. Splash-and-go stones, made from vitrified ceramic compounds, are non-porous and only require a surface mist to work.
How do you know when a soaking stone is ready for work? Submerge the stone in a shallow basin of cool water. Streams of tiny bubbles will immediately begin rising to the surface, like air escaping a dry garden brick. Leave the stone underwater for roughly 10 to 15 minutes. Once the stone stops producing bubbles completely, its pores are fully saturated. At this point, water will stay on the top surface rather than disappearing down into the core.
As you begin grinding the knife against the wet block, the stone releases tiny particles of abrasive grit that mix with the water. This gray, milky liquid is called the slurry. Beginners often make the mistake of washing the slurry off the stone during sharpening, assuming it is dirty waste. Do not wash it away. The slurry functions like liquid sandpaper, cushioning the blade while the loose particles roll against the steel, polishing the bevel and accelerating the cutting action.
To keep your workstation safe and predictable, place the wet stone on a damp tea towel, a wet silicone mat, or an adjustable rubber stone holder clamped over a rimmed baking sheet. If the stone shifts or wobbles while you are pushing a sharp piece of steel across it, you will lose your angle and risk cutting your fingers. Splash fresh water on top of the block whenever the slurry starts to feel gummy or pasty.
Locking Your Wrist to Keep Edge Angles Consistent
The single most critical mechanical skill in hand sharpening is holding the knife at one consistent angle from the heel of the blade to the tip. If your wrist rocks back and forth as you push and pull, you will produce a rounded, convex edge that never forms a true apex. The secret to holding an angle does not come from your fingers; it comes from locking your wrists and using your upper body to drive the stroke.
To find your starting angle, place the blade flat on the stone with the cutting edge facing away from you. Now tilt the spine of the knife upward. For a typical German kitchen knife, you want a gap between the spine and the stone roughly equal to the thickness of two standard quarters stacked together. For a thinner Japanese knife, aim for the thickness of a single quarter or a wood pencil. Once you see that angle, freeze your wrist joint entirely.
- Grip the knife handle firmly with your dominant hand, placing your index finger along the spine of the blade to support balance.
- Place the fingertips of your non-dominant hand directly on the flat of the blade, roughly a quarter-inch behind the edge, to apply light downward pressure against the stone.
- Lock your wrists and elbows in place. Instead of bending your arms to slide the knife, lean your torso forward and backward from your hips to glide the steel across the surface.
- Push the knife diagonally forward across the stone, moving from the heel near your hand outward toward the tip in long, sweeping passes.
- When reaching the curved belly near the tip of the blade, lift your elbow slightly upward by a fraction of an inch to keep the rounded edge flat against the abrasive surface.
Keep your downward pressure light. Many beginners push down with all their strength, thinking more force sharpens metal faster. Heavy pressure gouges the stone, bends thin blades, and causes the edge to flex off angle. Let the abrasive particles do the cutting. Use about as much downward pressure as you would apply to scrub a stubborn piece of dried egg off a dinner plate.
Feeling the Burr with Your Fingertip Safely
How do you know when you have removed enough metal on the first side of the blade? You do not guess, and you do not count strokes. You sharpen side A until you raise a burr, and only then do you flip the knife over to work on side B. Understanding the burr removes all guesswork from sharpening.
A burr is a microscopic ribbon of steel that curls over the very tip of the edge. As your stone grinds away the face of the knife facing downward, the metal at the apex becomes so thin that it can no longer support its own weight. Instead of grinding away cleanly, it folds over toward the opposite side, away from the stone. When you create this ridge along the entire length of the blade, you have proof that you ground away the old rounded edge down to a true point.
Never run your finger parallel along the length of the knife to test for sharpness; that is how deep cuts happen. To check for a burr safely, wipe the blade dry on a towel. Lay your thumb pad flat against the face of the blade that was facing up during sharpening. Slide your thumb gently down the flat steel and off the edge, moving strictly perpendicular to the blade line. If the burr has formed, your skin will catch on a rough, wiry lip that feels like the raised tooth of a zipper or rough sandpaper. If the edge feels smooth and slides off without catching, return the knife to the stone and continue grinding that section.
Check the entire edge in three distinct zones: the straight heel, the middle belly, and the curved tip. A burr must be continuous along the entire blade. If you feel a rough wire at the heel but the tip is smooth, you have only sharpened part of the knife. Spend a few extra passes focused on the tip until the burr connects from end to end. Once the burr is present everywhere, flip the blade over and repeat the exact same process on the second side until the burr folds back over in the other direction.
Stropping on Bare Leather to Remove Micro-Fins
Once you have worked both sides of the knife on your finishing stone (typically a 3000 to 5000 grit stone), the knife is sharp, but the apex is still covered with microscopic, jagged teeth called micro-fins. These tiny metal shreds are the remnants of the burr you raised and folded back and forth. If you take the knife straight to an onion, these weak micro-fins will snap off during the first cut, leaving the blade prematurely dull. Stropping strips these metal fragments away, leaving a clean, mirror-like apex.
A strop is simply a strip of vegetable-tanned leather glued flat to a rigid wooden backing board. You do not need abrasive compounds or diamond paste for daily kitchen blades; clean, smooth, bare leather works exceptionally well. The natural silicates inside animal hide are hard enough to align and break off micro-fins without abrading the core steel of your knife.
The stroke on a leather strop is the exact opposite of the stroke on a whetstone. On a stone, you push the cutting edge forward, as if you were trying to slice a paper-thin layer off the top of the block. On leather, pushing forward will immediately cut deep into the hide and ruin the strop. You must pull the blade backward, dragging the edge behind the spine in a trailing stroke.
- Lay the leather strop on a stable, flat surface with the smooth grain side facing up.
- Place the heel of the knife flat against the leather, then tilt the spine up to match the sharpening angle you used on the stones.
- Using almost no downward force, only the weight of the knife itself, drag the blade smoothly backward toward your body while sliding from heel to tip.
- At the end of the stroke, roll the knife over its spine, never over the sharp edge, to flip it to the second side.
- Pull the second side backward along the leather for an equal distance.
Repeat this trailing stroke for roughly 15 to 20 passes per side. With each pass, lighten your hand even further. When finished, rinse the blade under hot water and wipe it clean with a dry cotton cloth. You will have a refined edge that cuts cleanly through soft skins without dragging or tearing.
Common Mistakes to Avoid
Most sharpening frustrations come down to a few mechanical habits that are easy to correct once you know what to look for:
- Flipping the blade too early: Moving back and forth between side A and side B every ten strokes prevents you from ever establishing a complete burr. Grind one side until the burr forms completely from heel to tip, then flip.
- Using dry stones: Forgetting to soak or lubricate your whetstone glazes the surface with loose steel filings, preventing the abrasive crystals from cutting into the blade.
- Lifting the handle too high on the curve: When working the curved belly near the tip of a chef knife, lifting your entire arm vertically tilts the blade too steep, blunt-grinding the tip into a rounded point. Instead, raise your wrist just enough to maintain the original factory bevel.
- Ignoring a dished stone: Over months of use, stones wear down faster in the middle than at the edges, creating a curved hollow known as dishing. Trying to sharpen a straight blade on a scooped stone makes holding a consistent angle impossible. Flatten your stone periodically against a diamond leveling plate or wet coarse sandpaper laid on float glass.
- Excessive stropping pressure: Pushing the blade down into soft leather causes the hide to wrap up around the edge, dulling the very apex you just refined on the stone. Strop with a feather-light touch.
Practical Next Steps
To begin sharpening your own knives, start with an affordable two-sided combination water stone, such as a block with a 1000-grit coarse face on one side and a 4000-grit fine face on the other. This pairing provides everything required to reshape a dull kitchen edge and polish it for everyday cooking. Do not begin your practice on an expensive handmade Japanese knife or an heirloom blade; grab an inexpensive paring knife or a thrift store utility blade to learn how the steel responds to your hands.
Before touching your good knives, draw a thick black line along the cutting bevel with a permanent marker. Take two light strokes across your stone, then stop and inspect the blade. If the stone removed the marker ink right at the apex, your angle is spot on. If the marker is only gone from the shoulder above the edge, your angle is too low. If the marker is gone only from the very tip, your angle is too high. This simple visual check teaches your muscle memory what the correct angle feels like.
While standard whetstones handle almost all routine dulling, severely damaged knives with deep chips larger than a sixteenth of an inch, bent blades, or cracked bolsters require heavy grinding that can take hours by hand. For broken knives or valuable blades with structural warps, consult a professional cutlery sharpener equipped with slow-speed water-cooled belt grinders. For normal home cooking, however, setting aside twenty minutes a month with a soaking stone will keep your kitchen cutlery working safely and cleanly for decades.